Northern Plains — Precision Tools and Services for Smarter Water Management

Tile Drainage Equipment
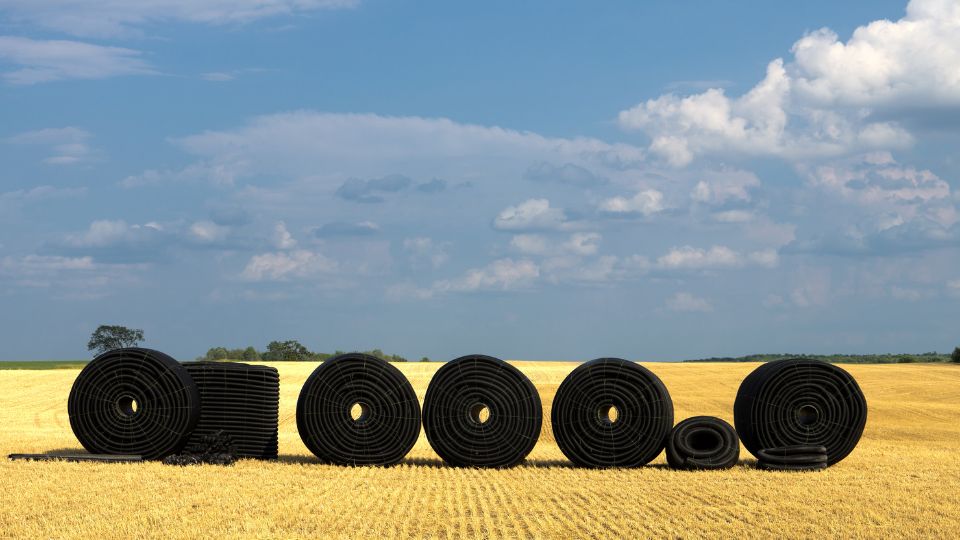
You can tile your own land and achieve professional results — and we’ve helped farms across western Canada do exactly that. The Soil-Max Stealth ZD is North America’s best-selling farmer-owned tile plow, making on-farm tiling both achievable and affordable. Alongside the plow, we supply quality drainage tile pipe throughout the prairies, giving you everything you need to take control of your land’s water management.
🛒 Order Drainage Tile Online
Fast, Easy, and Delivered Where You Need It. Skip the calls and outdated back-and-forth ordering process. With our Online Pipe Store, farms across Manitoba, Saskatchewan, Alberta, and BC can now order drainage tile, fittings, and accessories with just a few clicks. ✅ Drop a pin on your exact delivery location. ✅ Select your rolls, fittings, and pipe sizes. ✅ Checkout securely or request a delivered quote from your phone, tablet, or desktop

Ditch Assist RTK Grade Control & Guidance
We’re the innovators behind the Ditch Assist brand — trusted by farmers and contractors across western Canada and beyond. The original Ditch Assist brings affordable, simple, and powerful RTK grade control to scrapers, land levelers, and ditchers. Today, with the addition of Ditch Assist X and DIG systems for excavator grade guidance, our product line offers a complete, versatile solution to help you stay on grade with precision and ease.
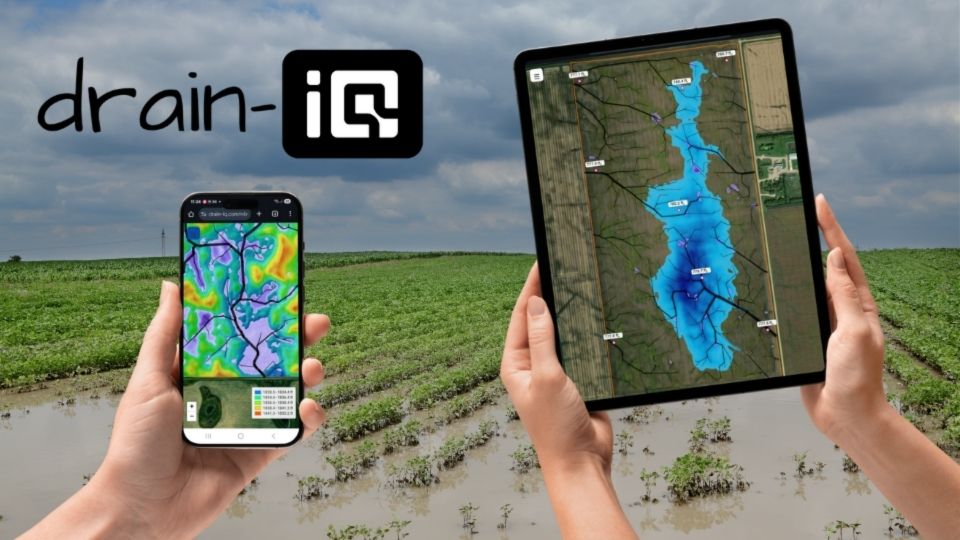
Drain-IQ™ Mapping Platform
Drain‑IQ is a complete, done‑for‑you drainage mapping service that pre‑builds all elevation and flow layers for every field on your farm. You’ll get a custom URL and QR code linked to interactive maps and simple tools to verify elevations, trace flow paths, and export PDFs or data layers from any device. It’s intuitive, affordable, and ready on day one—giving you expert‑level insights without any software hassle.
Municipal Drainage Surveying
Since 2011, we’ve provided Manitoba municipalities with professional ditch and culvert survey and plotting services that meet all Manitoba Water Stewardship permitting standards. Our precise profiles, clear mapping, and efficient workflows help keep projects moving smoothly from planning to approval. With a reputation for accuracy and reliability, we’re the trusted choice for municipal drainage projects across the province.
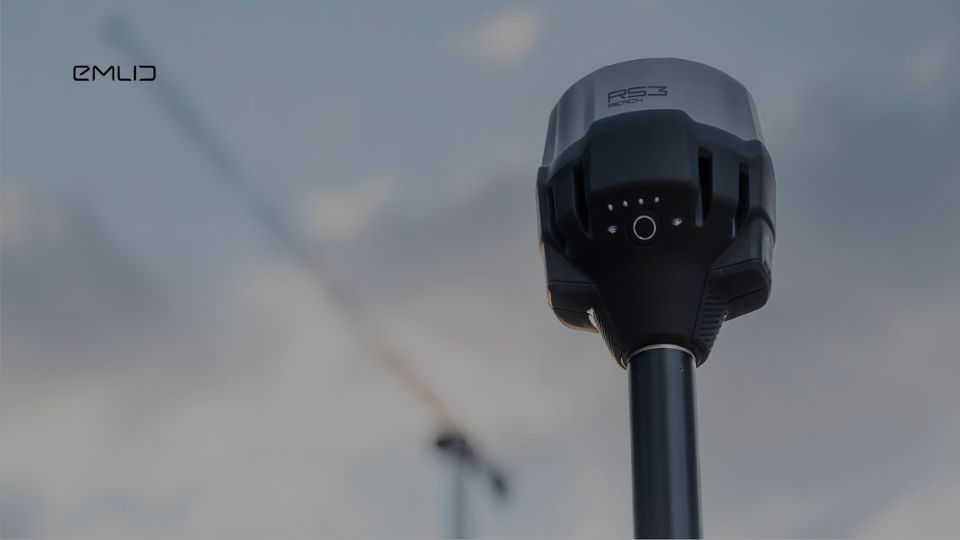
Emlid GNSS Systems
We’re your Canadian and US source for Emlid’s high-performance, great-value RTK GPS/GNSS receivers. Our most popular model, the Reach RS3, delivers multi-band accuracy, tilt compensation, and rock-solid reliability — perfect for precision ag, surveying, GIS, and more. Whether you need a single unit or a bulk order, we can supply complete packages with tripods, survey poles, and other accessories to make setup easy and your results precise.
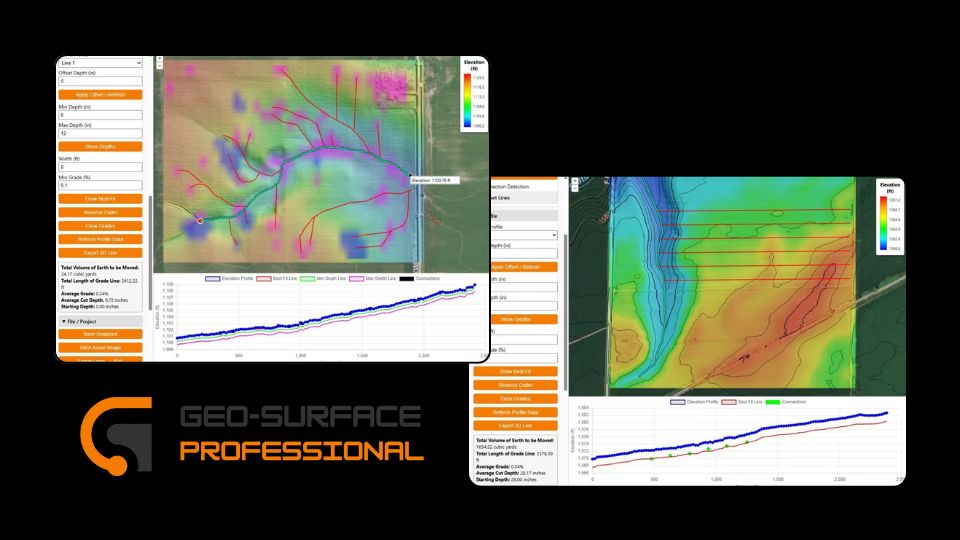
Geo-Surface Professional
Geo-Surface Pro is an on-demand LiDAR-powered drainage design platform for farmers and consultants creating surface or targeted tile drainage systems in your web browser. Draw your field outline and the system fetches LiDAR, processes it remotely, and returns terrain maps, flow routes, depressions, and more. Verify your drainage designs will work with automatic connection detection and validation. Ideal for advanced DIY or consultant projects.
Northern Plains Drainage Systems
Tile Drainage Equipment, Emlid GNSS, Municipal Drainage

Call Us at +1 (833) 675-2467
(833-N-PLAINS)
What We Do

Tile Drainage Equipment
Your trusted source for tile drainage equipment in western Canada. Our expertise and experience sets us apart as the leading supplier for farmer self installers.

Emlid Reach RS3 RTK
RTK GPS/GNSS receiver with tilt compensation. Affordable survey grade precision for precision agriculture, municipal, and construction applications.
Municipal Drainage
Manitoba’s most trusted supplier of municipal ditch and culvert drainage surveying and plotting. Our work is highly respected and meets al standards specified by Manitoba Water Stewardship.
Ditch Assist by Northern Plains Drainage Systems
Ditch Assist™ and Ditch Assist X™
We’re also the creators of Ditch Assist™ and Ditch Assist X™
Ditch Assist is the complete solution for automated machine control for ditching, land leveling, 3D land forming, and simple tiling.
Ditch Assist X keeps you on grade when digging with a backhoe or excavator.


Tile Drainage Equipment
Because they aren’t making any more land
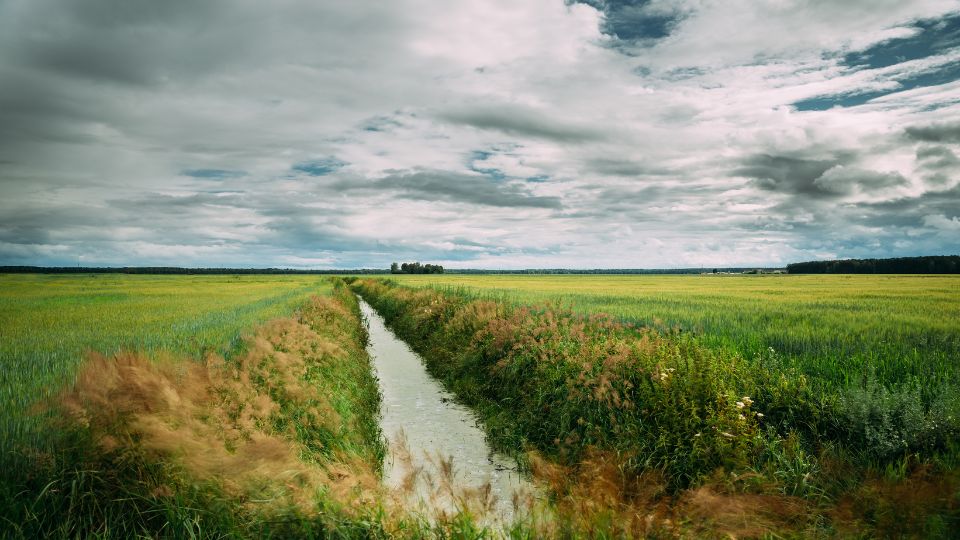
If maximizing yields and reducing in-field variability caused by excess moisture makes sense to you, then you should consider tile drainage.
Imagine not having to farm around waterlogged areas or lose crops to flooding. That’s what tile drainage can do for you. It’s not just about higher yields – it’s about reclaiming those problem areas and getting consistent results year after year. Many farmers see their investment in tiling equipment pay off in just one wet season!
Why Tile Yourself?
Forget the frustration of finding contractors for smaller tile jobs. What if you only want to target your problem areas? Own your tiling equipment and choose where and when to improve your land – it’s a great investment in your farm’s future. Owning your equipment puts you in control – tile when and where you need it, without relying on contractors.
Soil-Max Tile Plows. ADS Pipe. Training & Support.
Emlid Reach RS3 RTK GNSS
RTK GNSS receiver with tilt compensation


Survey grade precision for precision agriculture and beyond
Our goal is to make precision farming affordable. Get the survey-grade accuracy you need for machine control and field work with the Emlid Reach RS3 – a powerful RTK solution that’s easy on your budget. Stop overpaying for accuracy – this versatile system tackles everything from machine control to precise field layout.
Municipal Ditch & Culvert Surveys and Plotting for Drainage Licensing
We have been providing these survey and plotting services to Manitoba municipalities since 2011, and have surveyed more than a thousand miles of ditches. Our data collection and data processing workflows are streamlined, a result of what we’ve learned through experience. The products we deliver to our clients are highly valued by those using them to implement the drainage works.